

CLICK HERE TO DOWNLOAD THE PATTERN AND PDF INSTRUCTIONS
In the last part of this series, I go through the steps on how to sew and construct the cloak. Make sure you read Part 1 and 2 first so you know how to assemble the pattern pieces and cut the fabric!
Part 1: Assembling the Cloak Pattern Pieces
Part 2: Cutting the Fabric
CLICK HERE TO DOWNLOAD THE PATTERN AND PDF INSTRUCTIONS
Part 3: Sewing the Cloak
What you will need:
- Cut fabric, lining, and interface pieces (Refer to Part 2: Cutting the Fabric)
- Sewing machine
- Thread
- 3 large buttons
- (Optional) Trim
- Sew straight edges of fabric together.
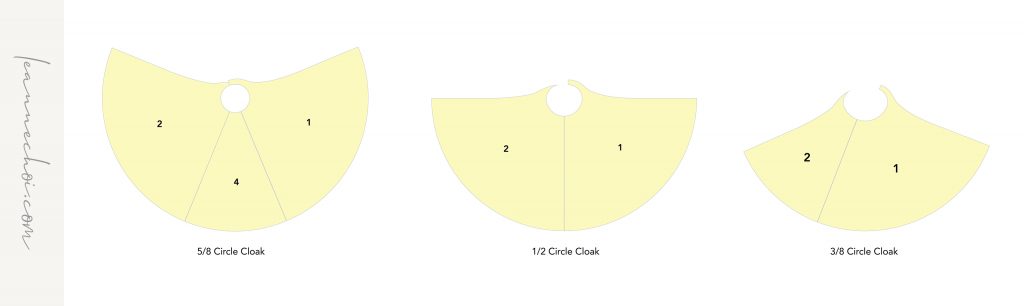
- For 5/8 cloak: sew CLOAK RIGHT to CLOAK MIDDLE along the straight edge. Then sew CLOAK LEFT to CLOAK MIDDLE along the other straight edge.
- For 1/2 & 3/8 cloak: sew CLOAK RIGHT to CLOAK LEFT along straight edge.
- For 5/8 cloak: sew CLOAK RIGHT to CLOAK MIDDLE along the straight edge. Then sew CLOAK LEFT to CLOAK MIDDLE along the other straight edge.
- Repeat with lining pieces.
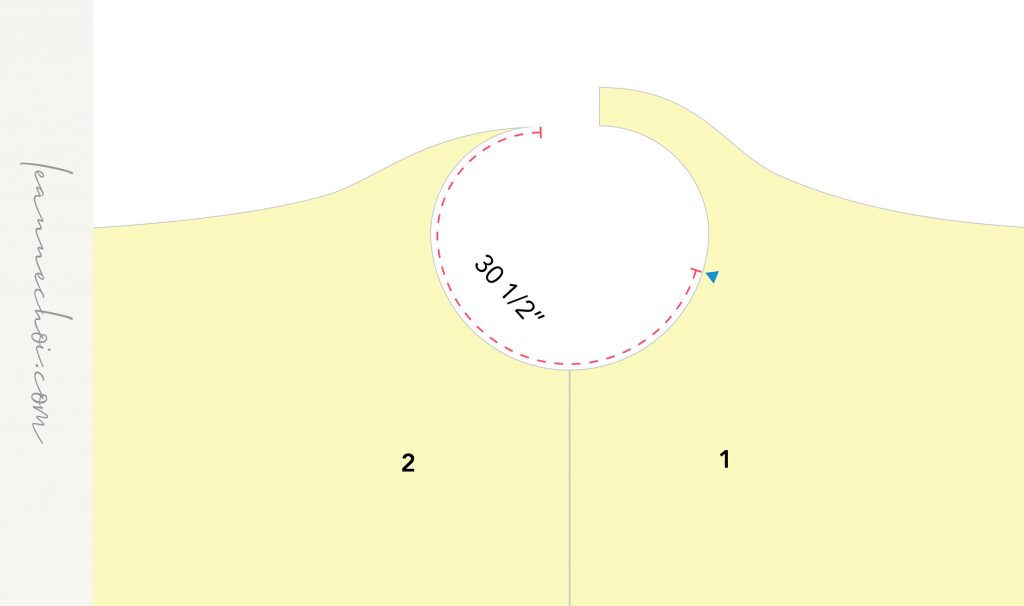
- From the left edge, measure 30 1/2” and cut a small notch within the seam allowance. (This is the measurement of the lower edge of the collar + 1/2” seam allowance.)
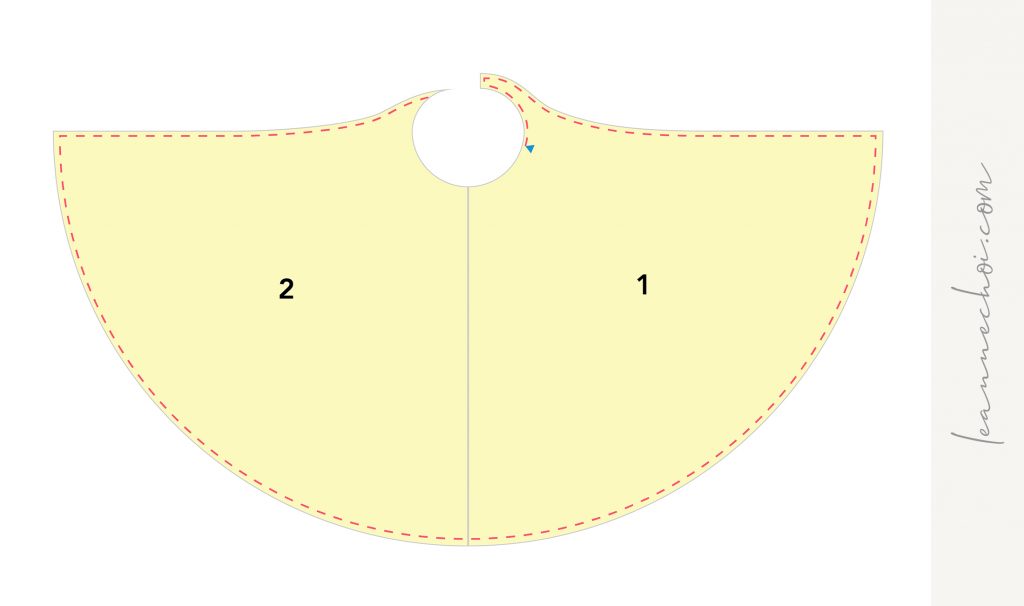
- With right sides together, sew lining to fabric along the right neckline from the notch, down both sides and the bottom edge.
- Clip the corners, turn and press. Baste the remaining neckline together.
- Apply collar interfacing or baste felt to wrong side of COLLAR fabric.
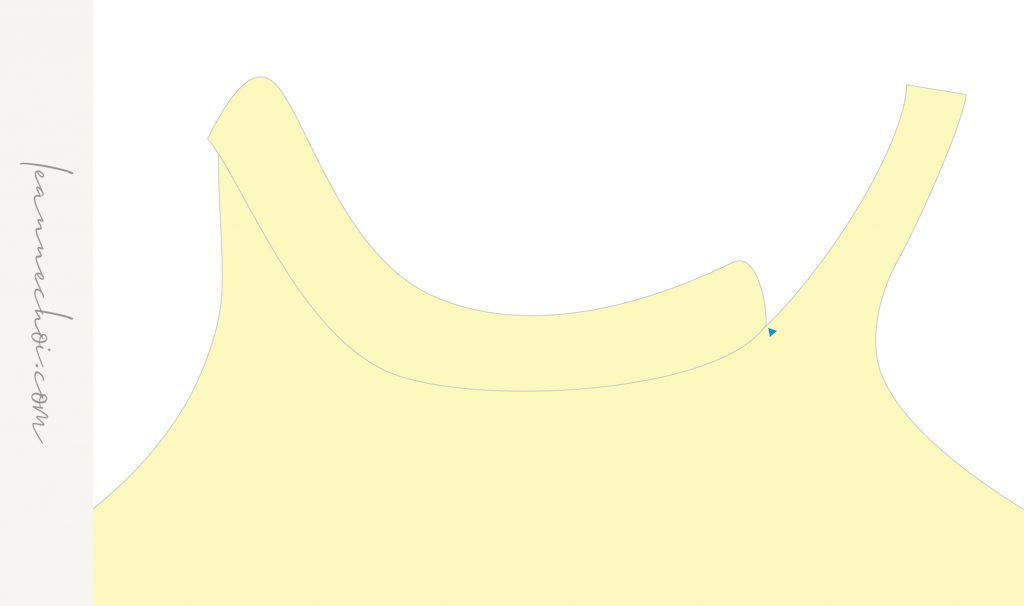
- With right sides together, sew COLLAR to CLOAK, aligning the left edges. (Don’t forget to account for the seam allowance of the cloak that is now turned to the inside.)
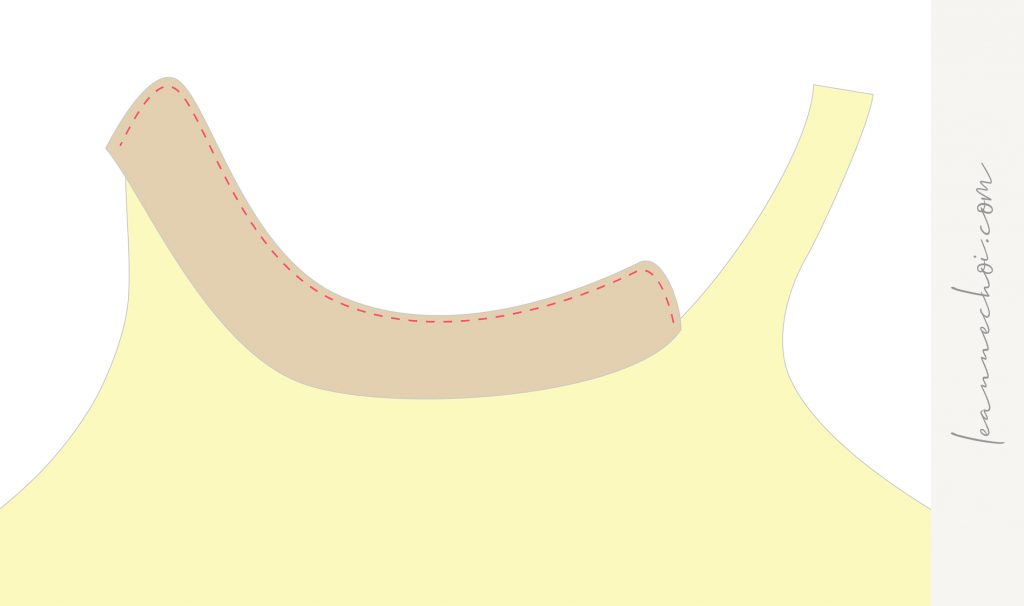
- With right sides together, sew collar lining to collar fabric along side and top edge.
- Clip the corners, turn and press the collar.
- On the inside, slip stitch the collar lining to cloak lining
- Optional: add trim around the neckline.
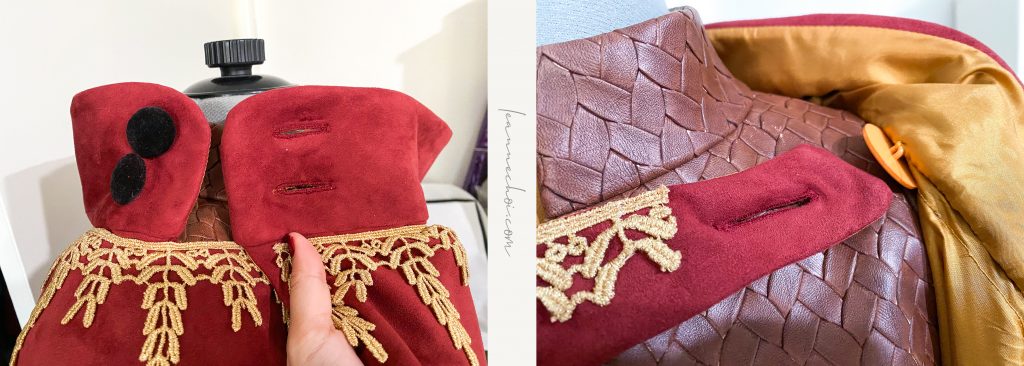
- Add 2 buttons on the right side of the collar, and 2 horizontal buttonholes on the left side of the collar.
- Also add a button hole to the right cloak extension, and a button on the inside of the cloak.
And you’re done! If you have any questions about any part of the process, leave a comment! If you use my pattern or instructions, tag me on instagram so I can see what you come up with!
Happy sewing!
as always,


John
October 2, 2021Thank you so much for putting this out there! This pattern is AWESOME! I scaled your pattern down to 2/3 and made a cloak for my daughter’s Halloween costume. It looks great!
I used a half circle design. Since it was scaled down, I was able to get a half circle out of 2 yards without having to sew quarter circles together. I think if I were doing it again, I’d round the corners of the extension tab and add some interfacing there to support the buttonhole better. Also, I found the final closing up along the neck seam very difficult – I think it might be easier to assemble the whole cloak inside out, leaving a few inches of the bottom hem unsewn for turning. I overcast the edge of the collar with a blanket stitch in blue embroidery floss.
My daughter loves it. Thank you again! I’m happy to send you pics of the finished product if you’re interested.